
Lane Change Testing: Evaluating Vehicle Stability During Sudden Manoeuvres
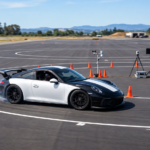
A lane change test is a controlled vehicle testing procedure used to evaluate stability, handling and steering response during sudden manoeuvres. During the test, a vehicle follows a cone-marked course, moving from its original lane into an adjacent lane and returning as specified by the test procedure.
The results help engineers assess how the vehicle responds to rapid steering inputs, changes in direction and potential emergency manoeuvres. This type of vehicle stability testing supports vehicle development and handling assessment under controlled conditions.
Unlike a driving licence road test, an engineering lane change test focuses on vehicle behaviour rather than the driver’s general road skills.
Key Takeaways
- Engineers assess vehicle response during a controlled, sudden lane change.
- The test driver follows a cone-marked lane-change track.
- Vehicle setup, track conditions and loading affect the test.
- Clearing the cones does not alone settle the handling assessment.
- Requirements depend on the procedure and authority that apply.
The purpose is to assess the vehicle, not to judge a driver’s license skills. The course layout and test conditions determine how that assessment can be carried out and compared.
How Does the Lane Change Test Evaluate Vehicle Stability?
The engineering test evaluates a vehicle’s response to a rapid, controlled lane change, not a driver’s license eligibility. A test driver negotiates a set course under qualified test oversight, while a road test assesses how a person drives.

Engineering assessment versus a road test
A road test looks at the driver’s choices and skills on public roads. An engineering lane change test instead studies how the vehicle responds when the driver follows a defined path.
The test driver is not making ordinary traffic decisions during the run. The driver steers through a marked lane, moves into an adjacent lane, and returns as the procedure directs.
One light-vehicle procedure applies to vehicles with a gross vehicle mass up to and including 3,500 kg. Its assessment is subjective and considers road-holding ability and handling during an emergency lane-change manoeuvre.
That scope describes one procedure, not a universal Indian approval rule. Indian approval or certification requirements depend on the applicable authority and protocol.
What Vehicle Behaviour Can the Manoeuvre Reveal?
A quick steering input can show whether the vehicle follows the intended path or moves wide. It can also expose body roll, delayed response, or a loss of stable control.
A vehicle lane change test helps engineers examine how steering response, suspension behaviour, tyre grip and vehicle loading influence handling during a sudden change of direction.
Vehicle behaviour depends on the whole system, including tyres, suspension, steering, loading and stability controls. A test can help engineers assess how those parts work together during the change.
How Is the Cone Track Laid Out?
The lane-change track is a cone-marked route that leaves the starting lane, crosses to a parallel lane and returns. Its six sections use widths based on the vehicle, so the path scales with the vehicle being tested.
Cones mark the boundaries of the path. The test driver first steers away from the initial lane, follows the offset route, then moves back toward the original lane.
One procedure divides the course into six sections. Each section has a set length and a width tied to vehicle width plus 0.25 m.
| Track sections | Combined section lengths | Section width |
|---|---|---|
| 1-2 | 15 m + 30 m | 1.1 × vehicle width + 0.25 m |
| 3-4 | 25 m + 25 m | 1.2 × vehicle width + 0.25 m |
| 5-6 | 15 m + 15 m | 1.3 × vehicle width + 0.25 m |
For these calculations, vehicle width excludes rearview mirrors. The lane offset is 3.5 m, which sets the lateral distance between the two parallel lanes.
Track limits run tangentially to the cones’ base circles. In practical terms, the boundary follows the outer edge of each cone base, rather than the cone’s center.
The six sections create a route with a clear entry, two lane changes and a return. Their changing widths give the test driver room that matches the course design.
That geometry only supports fair comparison when the track and environmental conditions are controlled. The surface, weather and measurement setup also shape each run.
What Conditions Keep Results Comparable?
A repeatable course requires more than correctly spaced cones. The surface, slope and wind must stay within set limits so the vehicle faces comparable conditions during testing.
Track surface and weather controls
The specified track is sealed, dry, hard and as planar as possible. Its skid number must be at least 70 under ASTM, a measure of surface grip.
The longitudinal slope must not exceed 1 degree. The transverse slope must not exceed 2 degrees, and wind speed must stay at or below 3 m/s, or 11 km/h.
These limits reduce outside effects on steering and vehicle movement. A slope can pull a vehicle toward one side, while wind can affect its path during a fast change.
Speed measurement also uses a defined distance. The average-speed distance runs from the start of section 1 to the end of section 5.
Position and vehicle-dynamics measurements
Extra measurement channels can help explain what happened between course entry and exit. Common groups include:
- GNSS position and velocity.
- Inertial data, such as roll, yaw angular velocity and lateral acceleration.
- CAN data, including engine RPM and steering angle.
GNSS means satellite-based positioning, while CAN is the vehicle network that shares data among electronic systems. These signals add detail beyond a visual record of the run.
Comparing speed or lateral position against distance can show how the vehicle tracked through the course. A sudden position change may help explain a wide path or a correction by the driver.
Measurements do not replace the required protocol. They add information for engineers, while the procedure still sets the conditions used to judge a valid test.
With the track and environment controlled, attention turns to the vehicle’s condition and equipment before it enters the course.
How Is the Vehicle Prepared Before Testing?
Vehicle test tare mass is the vehicle’s prepared, unloaded mass after specified equipment and fluids are included, but before test loads are added. It sets the starting mass for later test conditions.
Establishing vehicle test tare mass
The tare mass includes optional equipment likely to increase the vehicle’s mass. It also includes full required complements of lubricants, coolant and washer fluid.
Fuel must reach at least 90% of the manufacturer-specified tank capacity. This rule keeps the vehicle’s starting mass from changing greatly between runs.
Use the manufacturer’s stated tank capacity for the calculation. A partly filled tank below the required level does not meet the tare condition, even if the vehicle can complete the course.
The vehicle’s prepared, unloaded mass is not the same as its mass with passengers or cargo. Those loads are added later under defined conditions.
Including Standard Equipment and Substitutes
Include a spare wheel, fire extinguisher, wheel chocks and standard tool kit when the manufacturer supplies them as standard equipment. Optional equipment should also be included in the vehicle test tare mass calculation when it is likely to add mass.
Equipment should be in its normal place when the test begins. Its location can affect how the vehicle responds, not just the figure on a scale. Correct equipment placement is important for consistent vehicle stability testing.
For example, a missing 20 kg spare tyre and rim may be replaced with 20 kg of ballast. Secure the ballast in the spare-wheel well, where the missing item would normally sit.
Matching both the item’s mass and location helps preserve the vehicle’s balance. Loose ballast can shift during steering, changing the test conditions and creating a safety risk.
The vehicle test tare mass is only the starting point. The next step is adding the load required for each test condition during the vehicle lane change test.
How Are Test Loads and Mass Conditions Set?
The test uses defined loading conditions rather than an arbitrary passenger or cargo load. Passenger vehicles are tested at two mass conditions unless qualified oversight finds that one condition is sufficient.
The first condition adds the test driver to vehicle test tare mass. The second adds passenger and luggage loads at set amounts and locations.
| Condition | Added load | Distribution | Limit |
|---|---|---|---|
| Test mass 1 | Driver, at least 68 kg | Add ballast if needed to reach 68 kg | Do not exceed axle loads |
| Test mass 2, passenger vehicle | 68 kg per passenger seat plus 13.5 kg per seating position for luggage | Passenger load at seat H-points; luggage load uniform | Secure load and avoid substantial change to yaw moment of inertia |
| Goods-carrying vehicle | Test mass 1 plus ballast to gross vehicle mass | Uniformly over the goods-carrying area | Do not exceed axle loads |
For test mass 1, the driver must weigh at least 68 kg. If the driver weighs less, add ballast to make up the difference.
Test mass 2 adds 68 kg for each passenger-compartment seating position. It also adds 13.5 kg per seating position for luggage, distributed uniformly over the luggage compartment.
Passenger loading corresponds to 68 kg at each seat’s H-point. The H-point is the reference point for a seated occupant’s hip position.
For a goods-carrying vehicle, add ballast to test mass 1 until the vehicle reaches gross vehicle mass. Spread that ballast uniformly across the goods-carrying area.
All added masses must be secured. Keep axle loads within their permitted limits, and arrange the load without substantially changing yaw moment of inertia, the vehicle’s resistance to turning around its vertical axis.
Once the applicable mass condition is set, the vehicle and its load need safety checks before entering the track.
What Must Be Checked Before a Test Run?
The vehicle should not enter the course until it is roadworthy and the test driver is satisfied it is suitable to drive. A driver may refuse to proceed if the vehicle appears unsafe or unsuitable.
Mechanical condition and tyres
The subject vehicle must be roadworthy before testing. Check the key systems that affect control, especially the following:
- Brakes.
- Tyres and recommended pressure.
- Steering.
- Wheel alignment.
Tyres must match those specified in the modification application. They must be in good condition, have full tread and use the recommended pressure.
Loose items need secure restraint so they cannot move during the manoeuvre. A shifting tool or ballast can distract the driver and alter how the vehicle responds.
Roadworthiness is not a box-ticking exercise. A damaged tyre, poor alignment or steering fault can affect the vehicle’s path before the driver reaches the first cones.
Driver familiarization and refusal to proceed
The test driver must first drive the vehicle to assess its characteristics and learn its controls. This familiarization lets the driver notice unusual steering, braking or power response.
The phrase “vehicle must driven” is a shorthand sometimes used for this requirement: the test driver must drive the vehicle before the run. That step also helps confirm that the driver can operate its controls safely.
A driver’s refusal to proceed is a safety decision, not a failed cone run. If behavior seems unsatisfactory, the team should address the concern before the vehicle enters the course.
Once the vehicle and driver are ready, the test follows a controlled speed and run sequence.
How Is Test Speed Set and a Pass Recorded?
The test driver builds speed gradually and never exceeds the lowest limit that applies to that vehicle. One procedure begins at no more than 80 km/h and raises speed in increments of no more than 5 km/h.
Building up to the permitted maximum
One procedure sets the maximum test speed as the lowest of vehicle capability, the procedure limit, and any applicable vehicle restriction or posted limit. The sequence is:
- Begin at no more than 80 km/h.
- Raise speed by increments no greater than 5 km/h.
- Stop increasing at the lowest applicable maximum.
- Enter the course at that maximum test speed.
- Record exit speed and the engaged gear.
For this procedure, the limit is 110 km/h ± 3 km/h for MA vehicles and passenger cars. It is 100 km/h ± 3 km/h for other vehicles.
These figures belong to that procedure. They are not general Indian road-speed limits, and they do not replace a lower vehicle restriction or posted limit.
The test driver should keep the throttle as steady as possible through the manoeuvre. A sudden lift or surge can change the vehicle’s response and complicate comparisons.
Recording a valid run
A successful pass on the lane-change track displaces no cones. If the vehicle displaces any cone, the pass criterion was not met for that run.
The entry speed must be the maximum test speed. The stated test report records the exit speed and gear position, allowing the run’s end conditions to be reviewed.
A result can show whether the vehicle cleared the marked path at the required speed. It does not by itself describe every part of the vehicle’s handling or explain why a driver made a correction.
That distinction leads from the pass record to the handling assessment, where a cone-only result has clear limits.
What Can the Results Reveal About Handling?
A successful cone run shows the vehicle completed the prescribed path, not that every aspect of its handling is acceptable. Measured data and the test driver’s judgment address different parts of the result.
Reading measured vehicle response
Position and velocity data can show how the vehicle moved across the course. Lateral acceleration and roll can help describe how sharply it changed direction and how its body reacted.
Yaw response shows how quickly the vehicle turned around its vertical axis. Where relevant, stability-control data can help engineers see whether those systems acted during the manoeuvre.
These signals describe vehicle response, but no single signal gives a universal pass threshold for every protocol. Engineers read each measure in the context of the test setup and the required assessment.
For example, a lateral position trace may show a correction near a course boundary. It does not, by itself, prove the vehicle was unsafe or explain whether the driver had difficulty controlling it.
Why subjective assessment still matters
The test driver’s subjective report considers general handling up to legal speed limits, not only the lane-change run. That wider view can capture concerns that a cone count or sensor trace cannot settle alone.
A driver may recommend failure after a cone-clear pass if the vehicle was difficult to control. The concern can include whether a less experienced driver might find the vehicle unsafe.
Measured points and driver judgment should be considered together. A successful pass records that the vehicle completed the defined path; it does not erase concerns about control.
For a useful comparison, read the result only within its protocol and vehicle configuration. A change in loading, tyres or setup can change what the result means.
Conclusion
The value of the test comes from combining a repeatable run with an informed assessment of vehicle control. A cone-clear pass alone is not a universal safety certification.
Track conditions, vehicle setup and test loading help define what a result can say. The driver’s handling report adds a judgment that cone clearance and measurements cannot provide on their own.
Before arranging a test, confirm the applicable protocol and approval requirements with a qualified vehicle-testing professional or relevant Indian authority. Choosing the correct protocol is the right first step.
About
NP Electronics provides information and solutions related to automotive testing and engineering requirements. Vehicle testing plays an important role in evaluating vehicle performance, handling and stability under defined test conditions. A lane change test helps engineers examine steering response, vehicle behaviour and stability during sudden manoeuvres. Through technical information on vehicle lane change testing and vehicle stability testing, NP Electronics aims to help readers understand testing procedures, measurement requirements and the importance of reliable vehicle assessment.
Visit NP Electronics to learn more about automotive testing and related engineering solutions.
 Previous Post